
This guide will help you to understand how to connect your computer to wife. It’s based on Windows 7, but the procedure is very similar in other versions of Windows and in Mac OS X. You’ll find a useful guide to connecting other operating systems to wife on the BT website.
- See more at: http://digitalunite.com/guides/using-internet-0/connecting-internet/how-connect-
To get the terms right a modem is for connecting to the cable internet service that you have and they are not wireless. A router is what connects to a modem and dispurses the signal to your devices by either wireless or wire.
So do you have a wireless router ?
If you have set up a wireless home network then you also have a password for it. You need to put the password in the laptop in order to connect to the wireless network.
There are two places where this password can be and the first is in the router itself and you need to access the routers internal settings and go to the wireless section and select wireless security and you will then see the password.
The second is to go to a computer that is connected to the network and go to the control panel and select Network and Internet and then next select Homegroup or what your network is called and then next selet print and view the Homegroup or Network password and the next page will have the password.
You then write down the password and in your laptop go to network and sharing center and select join a network and then follow the instructions.
What you’ll need:
- a wireless router
- a computer with a built-in wireless adaptor or a separate adaptor.
Follow these step-by-step instructions to connect to wifi
 Step 1:
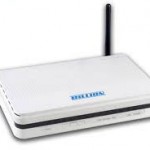
Set up your wireless router - an example of which is on the right -
(see How to connect to the internet for instructions). Most internet
providers now supply wireless routers as standard. When setting up one,
it’s important to provide appropriate security so that your computer
can’t be entered by anyone but you. Instructions for this should be
supplied with the router, but if in doubt, consult an expert.
Step 1:
Set up your wireless router - an example of which is on the right -
(see How to connect to the internet for instructions). Most internet
providers now supply wireless routers as standard. When setting up one,
it’s important to provide appropriate security so that your computer
can’t be entered by anyone but you. Instructions for this should be
supplied with the router, but if in doubt, consult an expert.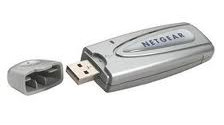 Step 2: Check that your computer has a built-in wireless adaptor (see left). Up-to-date laptops generally have one, but most desktop computers don’t.
To check whether there’s a built-in adaptor, follow these steps:
- Click the Start button.
- Right-click Computer.
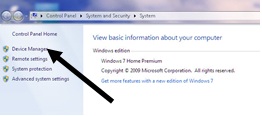
- Click Properties.
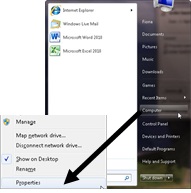
- Click Device Manager.
- Click the arrow next to ‘Network Adaptors’ to see if there’s a wifi adaptor listed.
If there is a wifi adaptor, a wifi icon should also appear in
the system tray in the bottom right-hand corner of the screen. In
Windows 7,
it looks like the one on the right.
If you don’t have a wireless adaptor, you’ll need to buy one to
plug into one of your computer’s USB ports. The adaptor should be
supplied complete with instructions on how to use it to connect to a
wireless network.
 Step 3:
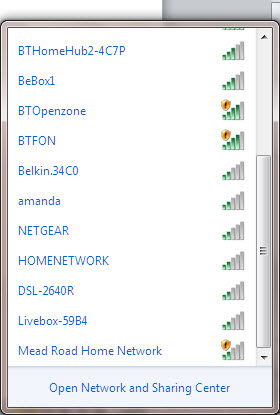
To connect to a wireless network, click the wifi icon. You should now
see a list of available networks – an example is on the left.
Step 3:
To connect to a wireless network, click the wifi icon. You should now
see a list of available networks – an example is on the left.
Step 4: To connect to a network, just click on its
name. If it’s a secure network and it’s the first time you’ve used it,
you’ll need a password. If it’s your home network, your internet
provider will have given you a password – sometimes it’s printed on a
sticker attached to the router.
If you’ll be using the same connection regularly, you can tick the box to connect automatically.
Step 5: The first time you connect to a network, you’ll be asked to choose whether it’s a home, work or public network.
Warning: Be very careful if you connect to unsecured wireless
networks such as wifi ‘hotspots’ in public places. While on them, it’s
important not to use websites that require you to enter personal or
financial details as other users of the network could gain access to
these details.
What you’ll need:
- a wireless router
- a computer with a built-in wireless adaptor or a separate adaptor.
Follow these step-by-step instructions to connect to wifi
Step 1:
Set up your wireless router - an example of which is on the right -
(see How to connect to the internet for instructions). Most internet
providers now supply wireless routers as standard. When setting up one,
it’s important to provide appropriate security so that your computer
can’t be entered by anyone but you. Instructions for this should be
supplied with the router, but if in doubt, consult an expert.Step 2: Check that your computer has a built-in wireless adaptor (see left). Up-to-date laptops generally have one, but most desktop computers don’t.
To check whether there’s a built-in adaptor, follow these steps:
- Click the Start button.
- Right-click Computer.
- Click Properties.
- Click Device Manager.
- Click the arrow next to ‘Network Adaptors’ to see if there’s a wifi adaptor listed.
If there is a wifi adaptor, a wifi icon should also appear in
the system tray in the bottom right-hand corner of the screen. In
Windows 7,
it looks like the one on the right.
If you don’t have a wireless adaptor, you’ll need to buy one to
plug into one of your computer’s USB ports. The adaptor should be
supplied complete with instructions on how to use it to connect to a
wireless network.
Step 3:
To connect to a wireless network, click the wifi icon. You should now
see a list of available networks – an example is on the left.
Step 4: To connect to a network, just click on its
name. If it’s a secure network and it’s the first time you’ve used it,
you’ll need a password. If it’s your home network, your internet
provider will have given you a password – sometimes it’s printed on a
sticker attached to the router.
If you’ll be using the same connection regularly, you can tick the box to connect automatically.
Step 5: The first time you connect to a network, you’ll be asked to choose whether it’s a home, work or public network.
Warning: Be very careful if you connect to unsecured wireless
networks such as wifi ‘hotspots’ in public places. While on them, it’s
important not to use websites that require you to enter personal or
financial details as other users of the network could gain access to
these details.
What you’ll need:
- a wireless router
- a computer with a built-in wireless adaptor or a separate adaptor.
Follow these step-by-step instructions to connect to wifi
Step 1:
Set up your wireless router - an example of which is on the right -
(see How to connect to the internet for instructions). Most internet
providers now supply wireless routers as standard. When setting up one,
it’s important to provide appropriate security so that your computer
can’t be entered by anyone but you. Instructions for this should be
supplied with the router, but if in doubt, consult an expert.Step 2: Check that your computer has a built-in wireless adaptor (see left). Up-to-date laptops generally have one, but most desktop computers don’t.
To check whether there’s a built-in adaptor, follow these steps:
- Click the Start button.
- Right-click Computer.
- Click Properties.
- Click Device Manager.
- Click the arrow next to ‘Network Adaptors’ to see if there’s a wifi adaptor listed.
If there is a wifi adaptor, a wifi icon should also appear in
the system tray in the bottom right-hand corner of the screen. In
Windows 7,
it looks like the one on the right.
If you don’t have a wireless adaptor, you’ll need to buy one to
plug into one of your computer’s USB ports. The adaptor should be
supplied complete with instructions on how to use it to connect to a
wireless network.
Step 3:
To connect to a wireless network, click the wifi icon. You should now
see a list of available networks – an example is on the left.
Step 4: To connect to a network, just click on its
name. If it’s a secure network and it’s the first time you’ve used it,
you’ll need a password. If it’s your home network, your internet
provider will have given you a password – sometimes it’s printed on a
sticker attached to the router.
If you’ll be using the same connection regularly, you can tick the box to connect automatically.
Step 5: The first time you connect to a network, you’ll be asked to choose whether it’s a home, work or public network.
Warning: Be very careful if you connect to unsecured wireless
networks such as wifi ‘hotspots’ in public places. While on them, it’s
important not to use websites that require you to enter personal or
financial details as other users of the network could gain access to
these details.
What you’ll need:
- a wireless router
- a computer with a built-in wireless adaptor or a separate adaptor.
Follow these step-by-step instructions to connect to wifi
Step 1:
Set up your wireless router - an example of which is on the right -
(see How to connect to the internet for instructions). Most internet
providers now supply wireless routers as standard. When setting up one,
it’s important to provide appropriate security so that your computer
can’t be entered by anyone but you. Instructions for this should be
supplied with the router, but if in doubt, consult an expert.Step 2: Check that your computer has a built-in wireless adaptor (see left). Up-to-date laptops generally have one, but most desktop computers don’t.
To check whether there’s a built-in adaptor, follow these steps:
- Click the Start button.
- Right-click Computer.
- Click Properties.
- Click Device Manager.
- Click the arrow next to ‘Network Adaptors’ to see if there’s a wifi adaptor listed.
If there is a wifi adaptor, a wifi icon should also appear in
the system tray in the bottom right-hand corner of the screen. In
Windows 7,
it looks like the one on the right.
If you don’t have a wireless adaptor, you’ll need to buy one to
plug into one of your computer’s USB ports. The adaptor should be
supplied complete with instructions on how to use it to connect to a
wireless network.
Step 3:
To connect to a wireless network, click the wifi icon. You should now
see a list of available networks – an example is on the left.
Step 4: To connect to a network, just click on its
name. If it’s a secure network and it’s the first time you’ve used it,
you’ll need a password. If it’s your home network, your internet
provider will have given you a password – sometimes it’s printed on a
sticker attached to the router.
If you’ll be using the same connection regularly, you can tick the box to connect automatically.
Step 5: The first time you connect to a network, you’ll be asked to choose whether it’s a home, work or public network.
Warning: Be very careful if you connect to unsecured wireless
networks such as wifi ‘hotspots’ in public places. While on them, it’s
important not to use websites that require you to enter personal or
financial details as other users of the network could gain access to
these details.


0 comments:
Post a Comment